A note on hinges: The modern-day hinge, used in nearly all cabinets, was developed about 60 years ago. Before that, nearly all hinges were either butt or gate. All vintage grandfather clocks used one of these two styles [those with a gate hinge wrapped the extended part around the inside of the door]. Many of the butt hinges had a narrower "leaf" for the door and a wider leaf for the stile. I can still get these hinges in the UK, but they are costly and will hold-up my building of the clock. The primary difference between the butt hinge and the modern cabinet hinge is the butt hinge falls in-line with the stile by being mortised into the door edge. The modern hinges stick-out from the door somewhat.
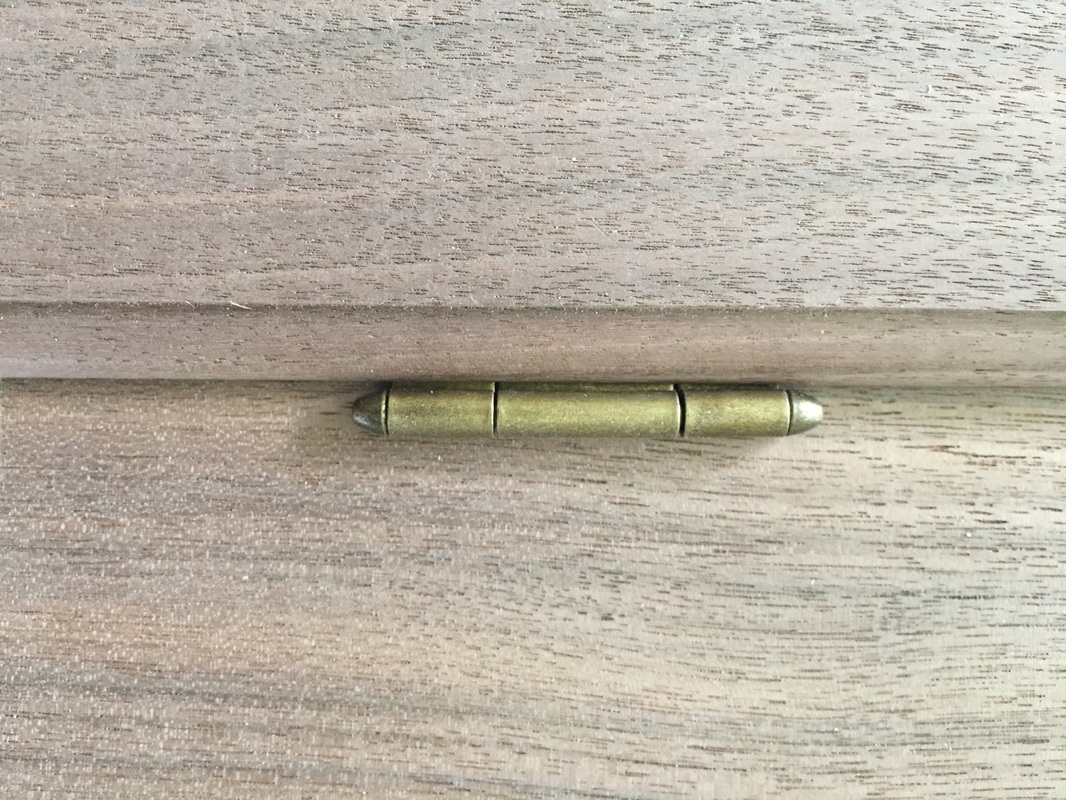
So, I've decided, and my wife agrees, to go with a, yes more modern, partial overlay hinge. I'm going to use the more bronze-looking, plain one shown in the mockup picture below. My rationale is that even though the escutcheon is clearly a polished brass, the plain hinge will easily blend-in with the dark walnut anyway. To make this hinge fit, I needed a 3/8" rabbet bit and picked one up today. The hinge wraps around the rabbeted back of the door very nicely leaving me very little guesswork. See photo below and read-on.
So, I've decided, and my wife agrees, to go with a, yes more modern, partial overlay hinge. I'm going to use the more bronze-looking, plain one shown in the mockup picture below. My rationale is that even though the escutcheon is clearly a polished brass, the plain hinge will easily blend-in with the dark walnut anyway. To make this hinge fit, I needed a 3/8" rabbet bit and picked one up today. The hinge wraps around the rabbeted back of the door very nicely leaving me very little guesswork. See photo below and read-on.
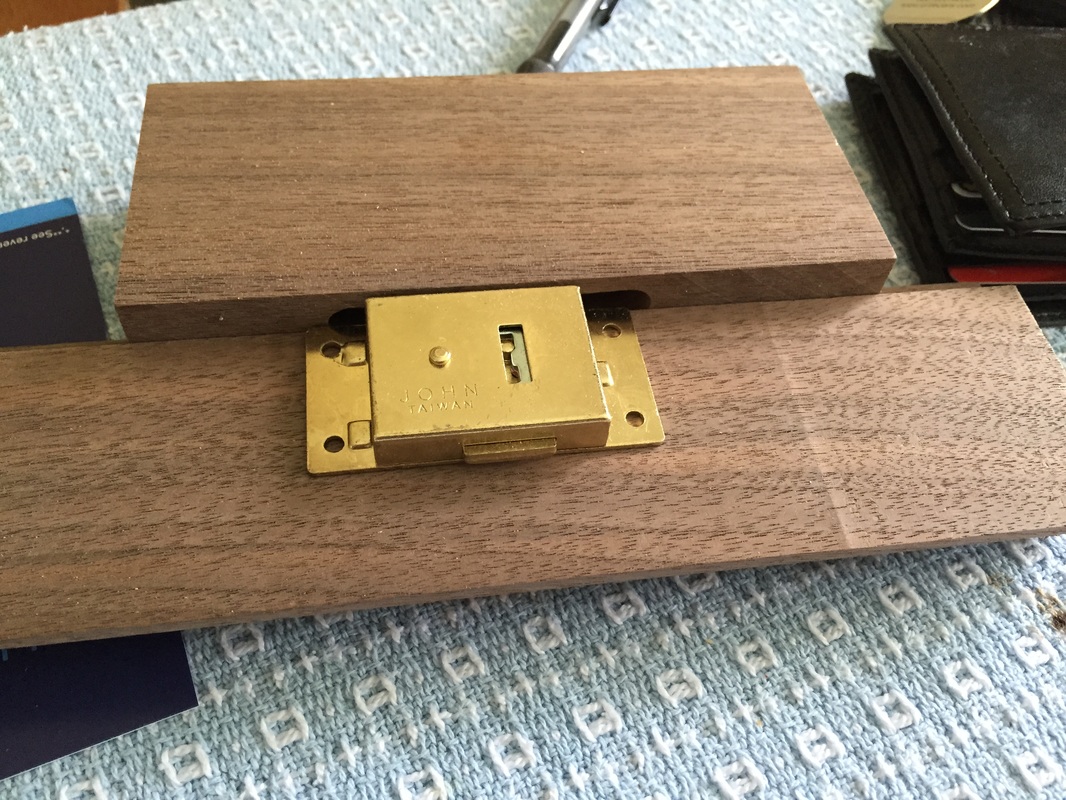
My $5 lock-and-key arrived in the mail today. I was anxious to test fit it into a slot made in the stile mockup. Turns-out, there is too much play in the slot. So I'll be trying a 1/8" straight bit tomorrow. It should then fit fine. See photo below of today's testing and read-on.
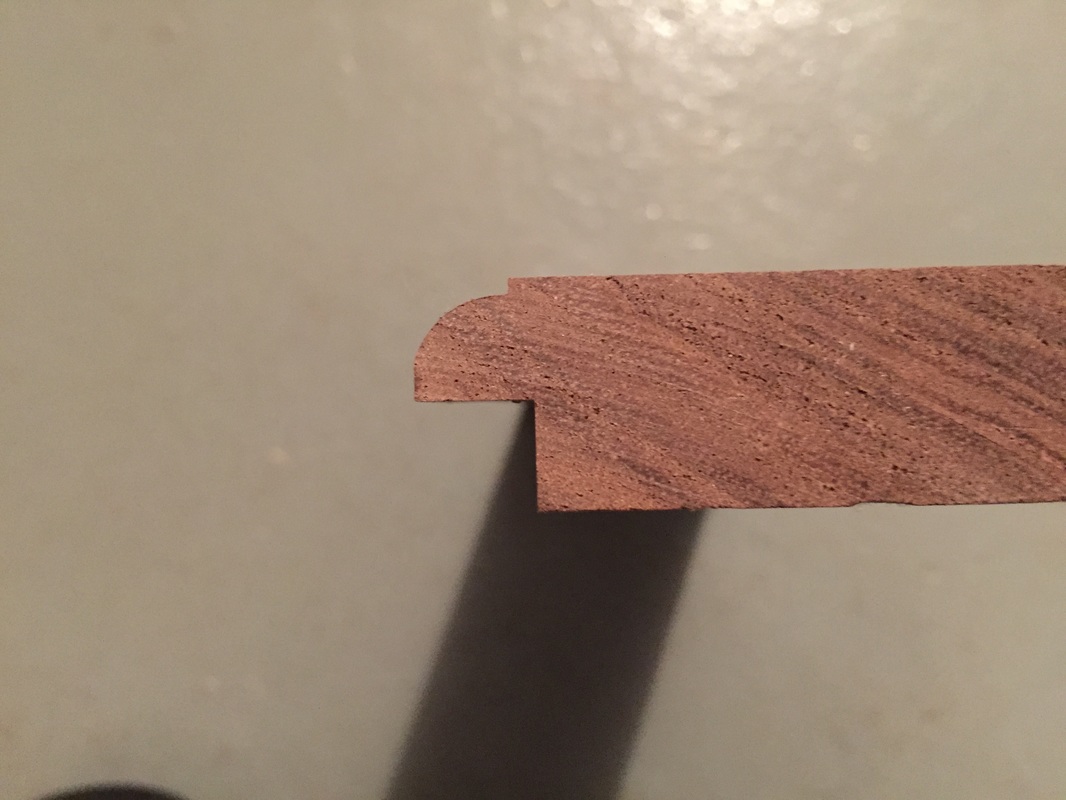
Tomorrow, and after grocery shopping with my wife, I plan to trim all of the waist section pieces [including the side boards] removing the snipe in the process. Once cut to size, I will again dry-fit and clamp the stiles and rails. Then, I will carefully work on the door. The door has a 5/16" roundover-with-edge on the front and a 3/8" rabbeted edge on the back [to sit flush against the case and to accommodate the lock mechanism]. Of course, the rabbeted edge means the front overlays the case opening. I need to make sure that the [remember, one-of-a-kind] door fits the case opening just right!! I'm sure I will ask my wife to supervise that operation. Further, I need to cut the slot for the lock mechanism in the stile and, perhaps, go ahead and cut the opening for the key in the door. So by tomorrow night, I expect to have a photo of the front assembly of the waist section - with the door. Note that all will still be clamped. I am not glueing-up until I'm satisfied. During the above, I will likely also be sanding. Here's hoping I have a good, productive day! My final picture below is a mockup of the door profile. Click on photos to enlarge.
 RSS Feed
